Italian Rainbow Cookies
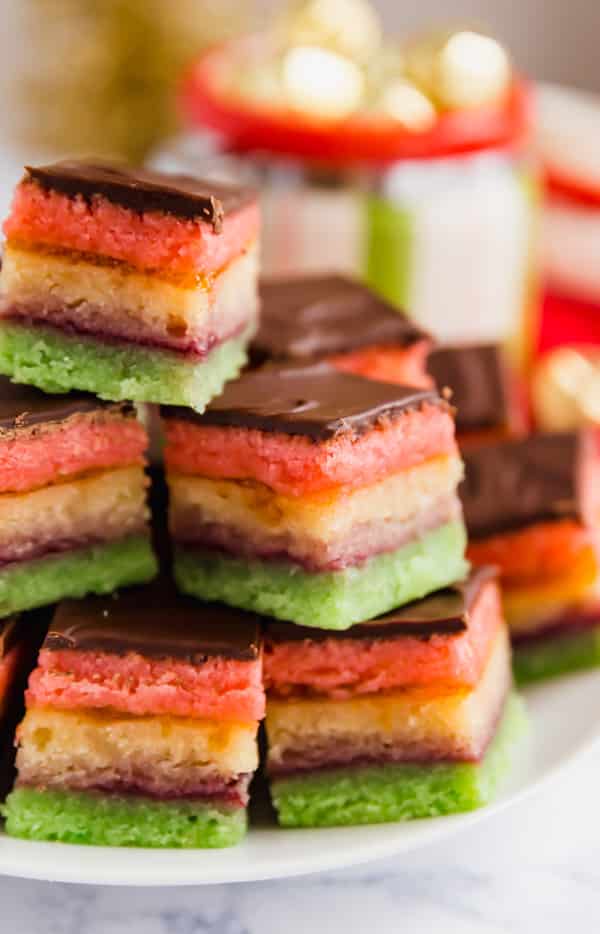
Whether you call these authentic Italian cookies Neapolitan Cookies, Tricolor Cookies or Rainbow Cookies, they are so delicious and are a gorgeous addition to any cookie platter! These are perfect for Christmas or any other holidays and special occasions.
Rainbow Cookies
It’s rare that I post a recipe that is labor intensive. I’m all about keeping things simple, but some recipes are too good not to share and this is one recipe where your hard work pays off!
You may recognize these Italian rainbow cookies from those lovely trays of Italian cookies that seem to make their way onto every wedding dessert table. Or maybe that’s just around here (we have a large Italian population in these parts!).
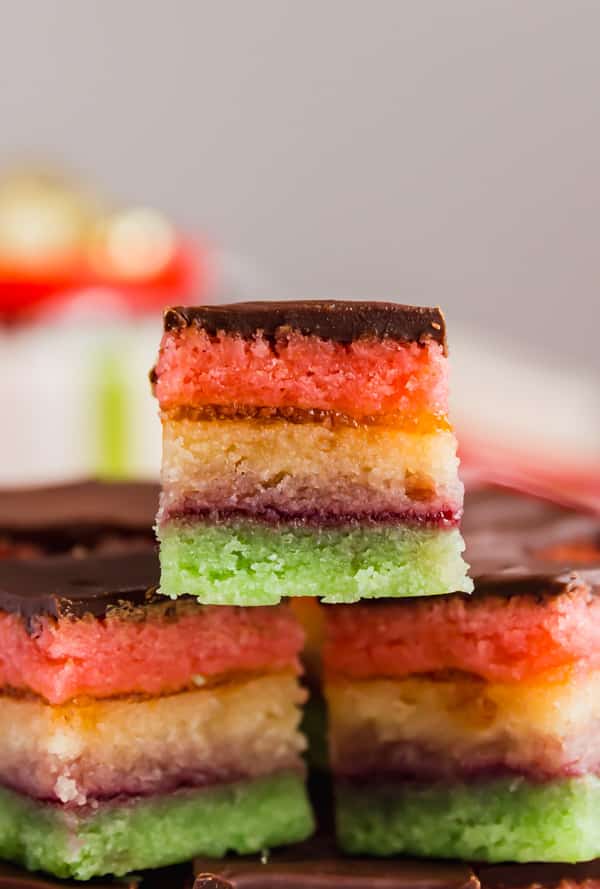
These were always a fixture on my family’s Christmas dessert table. They are another of my Grandma Rose’s confections and a favorite of most everyone that tries them. I totally get why! They look super impressive, with all of the pretty colors and layers. They’re have a rich almond flavor and you really can’t go wrong with anything topped with chocolate.
But I’d be lying if I said that I love to make them. Admittedly, they’re a bit of work than my usual go-to dessert options. Making these is a two day process that involves dealing with with temperamental things like whipping up egg whites and tempering chocolate, both of which are hit-or-miss for me and both of which required a couple of tries this weekend.
I know I’m really knocking it out of the park in terms of selling this recipe. But that’s why I broke these down and shared all my tips and tricks to help streamline the process and make it easy for you. They truly are a beautiful addition to any holiday or celebratory table and I encourage you to give them a shot!

Tips for making Italian Rainbow Cookies
- The pan size is pretty specific for these, it’s a 15.5 Inch x 10.5 Inch Pan
– this recipe has not been tested with another size pan so I couldn’t tell you if it would work in a different size. That said, most people have at least one pan this size in their kitchen, I actually have 4 and didn’t even realize it.
- Cooking spray and pan liners are your friend! Grandma used wax paper, but I’ve had excellent results with parchment. I lightly spray down the pan first, which acts as a sort of “adhesive” and helps the parchment stick to the pan. Then I spray it on top of the parchment as well to help avoid any sticking.
- I wrote a post sharing a few ways to make separating eggs easier, which you should check out!
- Make sure that when you whip your egg whites, you do them in a separate bowl with separate mixer attachments. Egg whites can be a bit temperamental when it comes to whipping them up and the times they wouldn’t whip up for me were a direct result of trying to reduce the amount of dishes and using utensils that already had batter on them. Lesson learned.
- In terms of food coloring, Grandma only added it to make the pink and green batter. If you’d prefer a really vibrant yellow, you’re welcome to add some yellow food coloring to the batter for that layer, but I didn’t. Gel food coloring is also an option if you want extra vibrant colors.
- For baking the cakes, all ovens are different. Mine were perfect at 12 minutes, but yours could go quicker. You want them cooked through, but not browned. That said, if they brown a touch on the edges, it’s ok because they get trimmed off.
- Weigh down the layers well once they’re assembled. My grandma used to use phone books but since they don’t really make those too much anymore, I use heavy cookbooks and weigh them down overnight.
- Melting chocolate can be tricky because chocolate can be very temperamental. There are two ways to do this successfully. If you want to do it in the microwave, check out my post about how to melt chocolate in the microwave. If you want to do it on the stove, use a double boiler over low heat and stir often.
- Around the end of the melting time, I like to stir in a teaspoon of coconut oil to add a little shine to the chocolate. The original recipe called for 3 tablespoons of margarine, but I don’t think that much is necessary. Don’t add it at the beginning or the chocolate might seize. You can also use butter or vegetable oil.
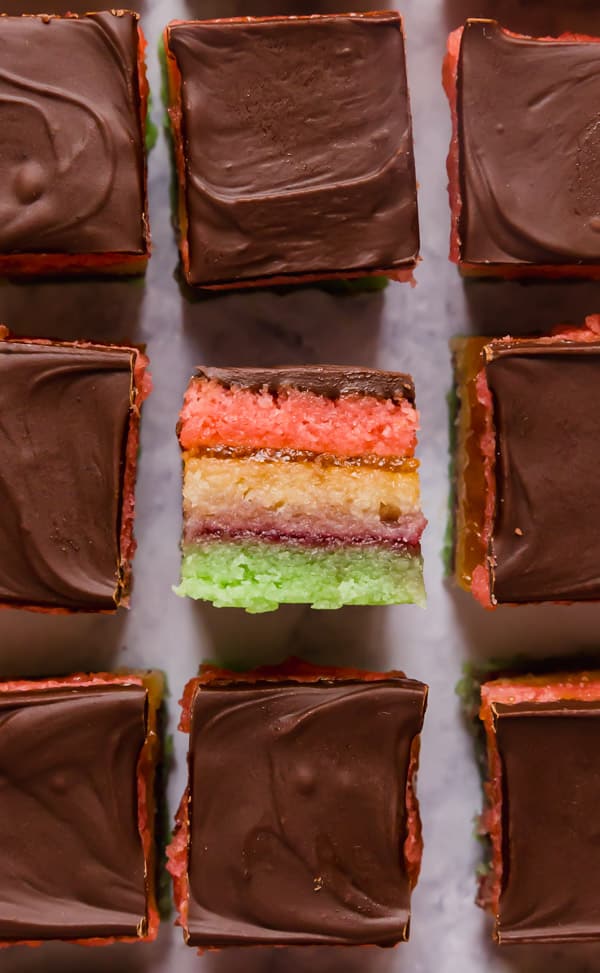
- Be sure to score the chocolate while it is still wet- this will make it easier to get cleaner cuts later.
- The recipe makes quite a few cookies; I encourage you to cut them into smaller pieces, as they are pretty rich.
Frequently asked questions about Italian cookies with almond paste
- Can you freeze rainbow cookies? Yes, these freeze very well! I typically make these shortly after Thanksgiving and then freeze until Christmas in an airtight container.
- How long do rainbow cookies last? They last around a week in the refrigerator but for several months in the freezer.
- What if one of the colored layers breaks when turning the pan onto the other layers? That’s totally ok! As you can see in my video tutorial below, my pink layer broke. I simply pressed the cracks together. This works out fine because when the large books weigh down the layers, it pushes them together and help to fix the cracks.
- Do I really need that much almond paste? Yes! It’s part of what makes this cookie so rich and delicious!
Italian Rainbow Cookies

Prep Time
30 mins
Cook Time
12 mins
Setting time
1 d
Total Time
42 mins
Whether you call these authentic Italian cookies Neapolitan Cookies, Tricolor Cookies or Rainbow Cookies, they are so delicious and are a gorgeous addition to any cookie platter!
Course: Dessert
Cuisine: Italian
Keyword: Rainbow cookies
Servings: 96 cookies
Ingredients
- 20 ounces almond paste, grated
- 2 1/2 sticks butter
- 1 1/4 cups granulated sugar
- 5 large eggs, separated
- 2 1/2 cups flour
- Red and green food coloring
- 1 10 ounce jar seedless raspberry jam
- 1 10 ounce jar apricot jam
- 1 12 ounce package chocolate chips
- 1 teaspoon coconut oil (or you can use butter or vegetable oil)
Instructions
- Preheat oven to 350 degrees. Grease 15.5" x 10.5" pans and line them with wax or parchment paper. Grease the top of the wax paper as well and set aside.
- Mix the butter and sugar until well combined and fluffy. Add egg yolks and mix well to fully incorporate.
- Add almond paste and flour and mix until just combined.
- In a separate bowl with separate whisk attachments, whip egg whites until they've doubled in size and are fluffy.
- Gently fold egg whites into the almond paste mixture until combined.
- Split the mixture into three separate bowls and add red food coloring to one bowl and green food coloring to another bowl leaving the last one plain. Use your judgement on drops, but I used around 10 drops each.
- Spread the batter evenly into the pans (be aware it will be quite thin) and bake for 10-12 minutes- keep an eye on them, they may need to go a bit longer if you put them in together.
- Once they've cooled, line a large pan with wax or parchment paper. Flip the green cake onto the pan first and evenly spread the raspberry jam on top.
- Next flip the yellow cake on top of this. Spread apricot jam evenly over the top of the yellow layer.
- Finally top it with the pink layer.
- Place some wax or parchment paper on top of the cakes followed by another pan. Weigh the cake down with a phone book (or a pile of books, which is what I had on hand) and chill overnight.
- The next day, uncover the cake.
- Melt the chocolate chips. You can do this in a double boiler over low heat stirring often or in the microwave in 30 second increments stirring between. When the chocolate is mostly melted add the coconut oil (or butter or vegetable oil if you're using that) and finish meting. Stir to combine.
- Spread this evenly on the top of the cake and score it with a knife into one inch squares before it hardens. I also score around the edges so that everything would have nice clean cuts on each side and so that I would have plenty of scraps to snack on.

- Chill this until the chocolate has hardened. Cut where they are scored and refrigerate until serving.
Source Article : Click here
0 Response to "Italian Rainbow Cookies"
Post a Comment